Pages

Tuesday, July 31, 2012

The Bedroom Dilemma


I am a mom of three boys (ages 6, 5, and 2). We live in a tiny 1400 sq ft, 3 bedroom ranch with no family room.  When our baby turned 2 I decided it was time to save my sanity, combine their bedrooms, and turn the baby's room into a playroom. 
At that time I had no extra time to build bunk beds and had stumbled upon a heck of a craigslist deal that came with 3 twin beds able to be configured all sorts of ways, a dresser, a desk, and a book shelf. It was amazing!

So this is how the beds have been set up for the past few months...

It's so... blah. The room is small-ish. And I would love to move a few of their toys into their room so I can carve out a craft space for myself in the playroom. So you know what I need??? A triple bunk! But there are so few decent ones. :(

Like seriously, this is the only one I even come close to loving... (photo found via google but sorce not correct, sorry.)

Now this I love! It would be perfect!! But I would need to do a trundle and I am not sure I want a trundle. But I am open to it in order to have a room that looks this good!
Via: The Obsession: More Built-In Bunks

Looking at my photos of my current beds again, I wonder if I have enough parts to turn it into a triple? But still, I just don't love it. It's so... farmy and barn like. Like a horse stall.


Hmm... just another thing for me to think about. If any readers have idea's I'd love to hear them!


Monday, July 30, 2012

Toy Chest

A few weeks ago my aunt asked if I could make her a toy chest. Always wanting to try something at least once, I said yes. I had several different challenges, mostly with building materials. I ended up deciding to make panels for all four sides using 1x12 and 1x4 pine boards. The image I had used as inspiration used plywood but in the end I think the way I did it has a lovely result.

By the time this little toy chest was ready for finishing I had said more than a few curse words (maybe I should have found a plan) and I had mumbled many times about never doing one again. But as soon as I started to stain I fell in love.  A lot of people find the finish work daunting, but for me it's the best part. It's when all the hours of cutting and sanding and assembly become a beautiful finished product built  with my own two hands. And with each layer of stain and poly all those mumbles and curses go away.


For those of you who may wonder, the finish is two coats of Rustoleum Kona Stain and 2 coats of polyurethane. The final size is about 16" deep x 33" wide and 20.5" tall. Inside there is a little over 4 cubic feet of usable space. While photographing this in my kitchen I could not help but think about how great something like this would be as a bench at my table. It could be great for storing linens or other kitchen items.

Thursday, July 26, 2012

Week in review; July 13-27


Boy have I been busy! This weekend I am doing my first ever flea market set up! They are having a Christmas in July weekend so I thought this might be the perfect opportunity to make a little cash. 

 
You saw another of these baby block sets last week. But here is one that was ordered. And I have a few more sets in the works.

Now check these out! I think I'll call them something along the lines of "Think Outside the Frame... frames". Okay, that still needs some thought. :)


I'm so in love. Those handsome little men really help to sweeten the photo's.


And I almost forgot these two little cuties.


And in my spare time I've been doing this...
Yes, that's a toy chest. No plans, just my from my head. And my mind has been so crowded that this is the first picture I have taken. I've got a few more hours of work left.  

Busy times! Hope you all have a great weekend! I'll probably be scarce for the next two weeks as I prepare for my husband's vacation by finishing up a lot of little things. Take care!

Linking up at AKA Designs DIY Link Party #41. Great blog, take a look!


Thursday, July 19, 2012

The Accidental Table

Last weekend I showed my Facebook Followers a sneak peek of my "accidental" table. Accidental because I had ZERO intentions of building a dining room table right now but when I stumbled upon legs for only $10 each I made a quick table plan in my head. And this is what I pictured!!!

I've done the step by step table post before so I won't bore anyone with that right now. Instead I'll share my finishing details.
I like to finish my tables in two pieces; top and bottom. It makes it so easy to get in all the nooks and crannies and doubly easier when you decide to do a two-tone finish. For my top I started on the underside with a little experiment. I applied Wood Condition to each outside board but not to the center board, hoping to see if there were any big differences.
You can see a slight color change on the conditioned wood vs. non conditioned. If interested in more on this topic read here.

After waiting about 20 minutes I applied the stain. And I really notices no difference. the only thing I did notice was that the stain went on more smoothly on the conditioned boards. Do you notice anything? Doubt it.

So I let the bottom dry over night then flipped her over and applied two coats of stain, sand between coats. I did ultimately decide to use wood conditioner on the top just to make it go on smoothly and for justincase.
I let the top dry overnight and then sanded again with 220 sandpaper and cleaned it really well before I started to apply polyurethane. I then did a total of three coats of poly, sanding with 0000 steel wool between each coat. Look at her shine! This was taken right after the last coat was applied so it is not actually quite this shiny.

Now, onto the bottom. Here's where bleep hit the fan. I applied wood conditioner, justincase, then stained, and I was immediately grossed out by the look of the legs. They were nasty. So sad. I have used similar legs before but used a gel stain so maybe that was the differencce.

Time for a change of plans!!!! Spray paint to the rescue! I love a good two-tone look anyway so my sadness quickly went away.

After all the spraying and drying overnight I distressed. Distressing is a tricky way to get rid of those spots that aren't very pretty and make them look like they were meant to be that way. Another thing to think about when distressing furniture is to think of where the piece would wear naturally over time. For a table like this it would be in the areas where chair legs would hit it and people would rub it while getting up and done from the table.


My accidental table. I am in love. It is not the table I planned for this space. But it will certainly do, for now. ;)


This post is linking up here:
AKA Designs DIY Link Party #40

Decoupage for Baby

Hey guys! I am keeping busy working on a few different builds plus now I am working on some crafts for a local Christmas In July sale. Exciting! Here is one of the things I have been working on.


Isn't it precious!? My cousin just had her first baby and I was excited to try this out. It is a twist on my Decoupage Post (which is insanely popular. Thank you Pinterest.) This time I added lettering, easy as that! Oh and I did get the distress ink. It is costly but neat and it comes in many different colors. The one I used here is called Tea Dye.  I am hoping these ink pads don't dry up fast. Here is a photo of the blocks before I added the letting. You can notice the distress ink more here. I added the ink before I applied it to the wood (letting it dry for a few minutes first).

So I will be working on a few more of these plus some other ideas that use Mod Podge too. These will soon be for sale!

$15 for two names (first and middle or first and last).

$20 for two names plus birth stats.


The blog post is linking up here:

Thursday, July 12, 2012

Crazy Kitchen: Part Three: The Power of Paint


To give myself a little credit, when we bought this home we were moving from an old house where primitive styling was perfect. Everything I owned was county, primitive, or Americana. And that was what I liked, at the time. So that is how I decorated our new home. (I actually have zero photos of the whole space. Strange.)


Fast forward about 2 years and my 1970's ranch was screaming at me about not being primitive. My taste and style had evolved with our home and it was time to get rid of the oh so yellow and maroon kitchen!

Something you may not know about me; I am an oops paint addict! I mean it. I have a true addiction. No one even questions me now. As soon as I enter Lowes my first steps are towards my oops paint. And my husband barely even grumbles about it anymore. But with well over 30 gallons of miscellaneous colors, I had to do something! So I mixed and mixed and tested it on the wall and mixed and mixed and tested it on the wall.... you get the idea. So I had a kitchen wall that looked like this for a couple of months...

Then FINALLY the day came that the ceiling was finished and I was ready to get onto the walls! Check it out!!!

What a breath of fresh air!

And all my oops paints (mostly Valspar, all semi-gloss) did an AMAZING job! No primer and just two coats of paint. Ahhh, MUCH better!


Another thing; I argued with myself over whether or not I should paint the ceiling in my dining area and hallway. I LOATH ceilings. But I knew it must be done. And I am so glad I did it. I used a Dutch Boy Ceiling Paint and was really not all that awful and I only had to do one coat. Score! I highly recommend painting your ceiling. It will really brighten up your space!

So that ends my Crazy Kitchen Posts (for now, you never know when something might come up)! I am excited to get onto some building projects for this space!


More from the Crazy Kitchen Series:

Tuesday, July 10, 2012

Coffee Coffee Coffee

I am VERY excited to FINALLY get around to build a coffee table for our living room. In December we bought a new sectional sofa and just went the easy route and used an old chest as a coffee table Now don't get me wrong, I LOVE this chest. It was so much meaning to me; it was my mother's Hope Chest and it somehow made its way into my home. But it was a little too tall and the top surface was not great for cups and feet. So today, I built one!

The "standard" coffee table height is around 18" OR 1"-2" lower than the height of your sofa. We must have a short sofa. I went with a table height of 15" knowing that our current 17" was not comfortable. Other things to consider when determining the size of a coffee table; length and width of a coffee table should be about two-thirds the length of the sofa, and make sure to leave at least 16" from the edge of the sofa.
After determining a rough size idea I went to my lumber stash. I had fully intended to use 2x3 pine for the top because I think it is all tiny yet beefy and precious (I am crazy about wood I tell ya). But as soon as I looked for the other materials I would need I right away changed my plans. I found three pieces of wood leftover from the disassembly of my mom's antique dining table. The size was a bit larger than I had in mind but using these pieces would make it easier, faster, way cheaper, and much more meaningful.
For the base of my table I used 2x3 legs cut with a slight angle. It is really simple to do a tapered leg like these. I just mark and cut one then use that first leg as the template for the rest. Once they are all cut I clamp them together and sand them to make sure they are all even to one another.


Once all pieces were  cut and sanded (legs, side and end aprons) I set up my Kreg Jig and marked and drilled all my pocket holes. On small pieces like this I really like to set up the whole piece as much as possible and mark out everywhere I need a screw. It really helps to save headaches later on (I tend to forget pocket holes for side aprons).

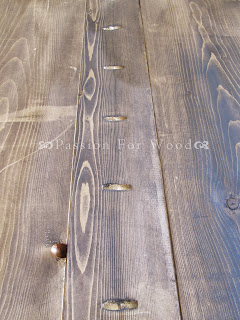
Isn't this beautiful?! Look at all the character!

After that I assembled the base, joined the top boards together, and attached the base to the top. Easy peasy.  But now that I have it in my space I have no ideas on how to finish it!


The old mahogany has really thrown me. I have a hard time matching red tones. Do I paint or stain the base?

I shouldn't touch the top, right? Other than to put on a fresh poly of course. And I really love the old holes in the sides. 


UPDATE: I decided to finish this by staining the base in a mahogany gel stain that is a close match to the top. After that I applied several coats of white wash. Then I buffed with 0000 steel wool and applied a spray protective finish to the entire project.


Pin It button on image hover