Pages

Tuesday, May 8, 2012

Operation: Coop That Chicken!


It's here! We are finished!!! About a month ago I started on this journey with Ana White to design and build a chicken coop. Now, this coop is not actually for me. It is for my sister... that's right, I am such an awesome sibling that I built this for her (I think we worked out a 50/50 egg deal but we'll see if that ends up happening!). I didn't exactly do it alone though. We had the help of both our husbands, a friend, and our daddy. We built this over the course of 4 days and about 30 hours!!! Ana White makes it fairly simple with her step by step plans. So even an intermediate builder and a few helpers can DIY this shed style chicken coop!

Day 1: Boy was it cold. 40 degrees and cloudy and damp, left us wondering how on Earth Ana does it up there in Alaska! But we pushed on and got past the cold fingers and built the entire frame and hung the siding. This was the day that we had the most helpers and it was so fun doing this with family.
After spending an hour and a half in my favorite home imporevment store and getting all of the supplies we were ready to begin!

The first step was to level the ground and build the foundation. In Ana's plans she shows you how to frame the floor. But as you can see we framed the floor with pallets! We used a 2x4 on each side to keep it square while the plywood was laid for the floor. After that was attached we removed those 2x4's making the floor frame a perfect 4' x 8'.

Next you have to build your walls. Follow the directions for the front and back walls exactly. For the side walls you will cut based on your window needs. Ana's plans gives you a design using no windows, but rather operational shutters! Chicken wire inside the opening protects the chicks. We chose to use windows (details on this further down) and made our opening slightly larger than the windows. Once the walls are all built you may now attach them to the floor, carefully keep everything square, and attach the walls to each other as well.

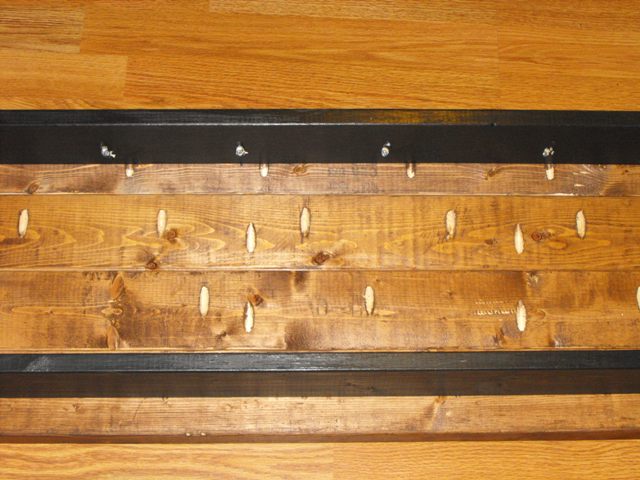
The roof supports was the first tricky part for me. It took me a few minutes and an "ah ha moment" to figure this one out! Cut your boards 49 7/8" long, with both ends 15 degrees off square. Then (the tricky part) measure down 2 5/8" on one end and mark a perpendicular line. Trust me, I was confused! But two minutes later I had it and even took a picture to help you guys with it too! Hope it helps. I cut the first board and then used it as my template for the remaining boards. Then I drilled pocket holes in them and screwed them on! So easy (after an "ah ha moment" of course)!

And a bit of a blooper photo. If you didn't bring enough ladders, make your own! That's my brother-in-law on the roof, myself, and my poor father holding me up.


Time for siding! We chose the most inexpensive T1-11 we could find at Lowes. While I love to save a few bucks, you might want to not get the very cheapest. If you do it will need to be painted on the inside to help protect the walls (something that is being worked on now). Plus, this stuff was messy to cut so make sure you have your eye protection and face mask! You will need to cut a hole for your chickens, windows, nesting box, and your "people door". All of these cuts will be based on where you have decided to locate these openings and their sizes (so measure more than twice and cut once!). We worked from the tall side first and made our cuts as we went. It worked out pretty well. You will need to trim off any excess material (like the edge/lip) so that later on your trim fit snug all the way around.


That is where I ended day 1. The next day my brother-in-law installed the plywood onto the roof. Make sure to account for your trim. He made the sides and back have a 1"overhang and did 6" on the front. These measurement can all be done to suit your taste and needs. My sister and brother-in-law also did the painting and staining on my days off. **Paint color used is Valspar Spa Pool and the stain used is Olympic Eiffel Tower** And yes, paint choice was one of the hardest parts!

Day 2: The slow and steady day! We had a friend come to do the roof (if you have never roofed, check YouTube for some great videos). We chose to use a rubber roof because supposedly they add a layer of insulation. You can of course use whatever roofing materials you can find and are comfortable with installing. We also worked on the trim and nesting box. Things actually went much slower on this day and it seemed like we didn't get too much done. Work one piece at a time in order to get precise cuts. The angles cuts will continue to be 15 degrees off square, just like the roof. We also built the frame for the nesting box, using lots of pocket holes. This box is strong! My camera stayed in the van this whole day :( and I was only able to get this photo on our way out the driveway.


Day 3 aka "let's get this done" day: Well, we didn't get it 100% finished on day 3 but we were close! It was just my sister and I (with a few little helpers and her hubby at the tail end) and we kicked butt! We finished up a few pieces of trim, cut and hung the shutters, constructed the door, had a few photo blooper moments, installed one window, and finished the nesting box.


To make the door you'll need to cut two 1x4's about 1/4" shorter than the height of the door opening and three 1x3's that are the width of the opening minus the width of both 1x4's, minus 1/4". Something important to keep in mind, if your door opening has gotten out of square make sure you cut you boards based on that. We were not perfect and one side was 1/4" shorter. This was not a big deal though, because I knew this and accounted for it. You can also keep your sander handy to help with any tight spots that may happen.


For the door backing you can either use scrap roof plywood, 1x6 boards, or even the siding that had been cut for the opening!  We chose the scrap siding method. To do this we laid the door frame on top of the siding, marked a line to cut the excess, and after cutting we used glue on the seam and screws all the way around. It really turned out beautifully if you ask me. :) You can then install your hinges. To hang you will need a few extra pair of hands. At 9:00PM we hung the door in the dark with only the light of a tiny lantern. And it opened and closed perfect on the first try! That's all thanks to a lot of measuring!

For the windows we used  two shabby old wood windows using a simple lock to close and chain/gravity to open. **Note: We may need to add more ventilation holes. To do this we will use a hole saw to make several evenly spaced holes and then cover them from the inside with hardware cloth.**


To attach the lid to the nesting box use good sized hinges that will be able to stand up to all that egg collection. Then add a closure of some sort.  We used plywood roof scraps for our lid.


Day 4: We finished and hung the second window. Then it was time to focus on the chicken door. We used the scrap from when we cut the opening and 1x12 scrap left from the nesting box cut to fit just smaller than the opening. We connected the two pieces together in order to have a nice strong door. Then I hung hinges and came up with a nice method of opening (simple chain and snap) but still need to think of a better closure before the chicks come.


We also added the rest of the door hardware.


After that all the hard stuff was over! It was time to touch up paint and stain and make her cute! And then time to take 20+ finished photos! We will focus on the run next, add things like roosts to the inside, and then it's time for the girls to come home! Wonder how long my sister will be forking over 50% of her eggs? I hope you all will decide to use these plans to build your own backyard chicken coop! I can't wait to see!


Friday, May 4, 2012

Holy Table... part 2

Happy Friday everyone! I finally remembered to take my camera to my mom's house and was able to get some decent photos of her Farmhouse Table in action. So to end the week, I'll share my version of Ana White's Farmhouse Table.


 Here is all of the lumber materials needed. Doesn't look like a table, does it? We splurged and got the turned legs and we are so happy we did!


The first thing I did was lay out what would become the top of the table. I cut my breadboard ends, marked and drilled pocket holes, and glued and screwed it all together.


The next part of constructing this table is to build the frame. This was simple for me because I kept the full8 foot length of the side aprons  and just had to cut both end aprons based upon the final width of the top minus the width of two legs. Here's the pieces cut with pocket holes predrilled. Doesn't look like a table frame does it?

Time for the legs! We laid the end apron on a spacer board then attached it nice and square to the legs.

Next we used the same spacer boards to raise up the side aprons and attached them to the legs. And a frame was born! I added 1x2 pieces about every 12 inches in order to screw up through to attach the top.


Now we laid the top face down and center the frame on it and screwed it on! It's that easy! As you can see, this table is about half the size of my whole kitchen!

On to the finish work. Sand until your arms seem like they might come off! I think I did 120, 150, 220 grit. Whew, more than an hour on that! Then I distressed it lightly and sanded it lightly again. Once it is all sanded and whipped clean it was time for stain. I used a mahogany gel stain from Minwax. I applied 3 coats, which was a challenge because I was working in my cold garage. So this is where it became time consuming!


After applying one coat of poly I decided it was too cold (heaters just could not keep up) so we waited a few days for that coat to dry and moved it to my parents house where I put on one more coat of poly. Over the next few days my Dad so kindly put on 3 more coats. After a few days cure time she was ready to use!
Here is the first coat of poly.

And here it is after a total of 5 coats of poly!


Things I would change if/when I do a table of this size again:
1) I would never make a bread board end so large again. I would stick to a 1x6 or smaller. With such a large size we worry about children putting too much pressure on the ends. But so far so good!
2) I will make the legs removable. It was a bear trying to get this table into the house. Thankfully the width was just narrow enough!
3) I won't tackle this in the winter months! Construction of the table took only a few hours but finishing in freezing temps took weeks waiting for warm-ish temperatures

I can't wait for the next one! This table was by far my favorite build to date!

Thursday, May 3, 2012

Decoupage Decoupage Decoupage!!!

**New Decoupage post added here.**


I have spent the past two days teaching myself a new skill. You guessed it... DECOUPAGE (proud that I can spell the word now BTW) I had done a lot of Google searches for scrap paper wall art and I really loved it. This was trial and error and it really was not too bad. BUT I did have one pretty big fail, read on for the details (there will not be pics posted of my fail).

Here's my step by step!
I bought 2 4 foot 1x12's. You can use whatever size you want or need. I then cut them into 8 equal pieces and sanded them just enough to clean them up and wear down  the edges.


Next up I put a coat of stain on the sides and around the edges. I went ahead and filled in the centers just for fun but probably won't worry about that next time. You could also use paint in a color that coordinates with your paper.


After you wipe them clean it's time for your Mod Podge. This stuff is kind of expensive and did not go as far as I thought. Boo. BUT just make sure to stock up when it's on sale like I will be.  So, you put a thick coat on your surface and your paper. When you apply the paper to your surface try REALLY hard not to leave bubbles or wrinkles. I used an old credit card then switched to a small rolling pin. Either way works, just work carefully and slowly and work from the inside out!! Wipe up glue that comes out of the edges.

Here is what it should look like once your paper is on and smooth.

Next up, it is VERY important to wait 15-20 minutes before you put another coat on top. Set your timer. The waiting helps to lessen wrinkles... so wait! You can apply 1 or 2 or 3 more layers if you'd like. Some people use 0000 steel wool between coats. I did not but might in the future. This step would be needed if you want to reduce brush strokes but using a foam brush would also help with that problem. I thought that I would like the brush strokes, and do. It gives it more of a canvas feel.

This is after two top coats have dried.


Now, you could stop there if you'd like and pop these guys on your wall.

But I went a little further.  The blogosphere will tell you to use "distress ink" but really, I forgot to buy it. So I used some watered down black paint. I smudged it on in the corners and around the outsides. Then blotted it with a paper towel. In my opinion it turned out great on the black paper but not so great on the lighter papers (see image below). (I will try distress ink in the future just for fun).


So, since I was not O.M.G. in love with the lighter ones I went one step further. I printed off 2 8x8 black and white photos and after doing a color bleeding test I went ahead and Mod Podged them on. BAD IDEA! My test had lied to me. Once dried it ended up looking very green and ugly. So I ended up spritzing it with water and gently peeling off the paper image. It worked! I did have to do some light sanding to get the last bits of the bad picture off. But the layers I had done on the original part was still good.

Moving on! After that I decided to get into my photos and find some shots that would mesh well. Now, I am not set on these images sizes (really wanted a square) so for this reason I just placed the pictures on. I gotta say, I am pretty O.M.G. over my handsome little men on these! And the shot with the flowers would look really pretty with a larger square picture.


So there it is. Two days of trial and error and a few hits and a miss. I will be finding larger square pictures to add permanently. And I do plan on doing more. What do you think? I have grand dreams of spending my winter months doing decoupage. :)


Friday, April 27, 2012

ReUse... pallets!


One of my top favorite things to do is to use reclaimed materials. And the best way I have found to do this is with used pallets. Now, they are a PAIN to work with and take a lot of time to cut or disassemble, but in the end you can end up with a very inexpensive shelf or piece of furniture. Really the only costs that go into working with pallet wood are the cost of your blades (cause they really eat up blades),  screws or nails, plus any finishing materials like sandpaper plus paint or stain. Here are a few examples of things that I have made on the cheap with pallet wood!

Below are examples of a few different variations of shelves and some different uses.


 Here is a bench that sits at the end of our drive. Perfect for waiting on the bus.


 Below is a pallet crate.
I've used these in the past as a book shelf hung on the wall and also as a crate to hold fire wood.


I love this planter box!


And here are two simple little bird houses made using only scrap wood.  


Thanks for looking! Feel free to pin. ;) And as always, search keyword "pallet" on Ana-White.com for more great ideas!


Tuesday, April 24, 2012

Rack em up!


So while I am working on a VERY BIG PROJECT (really, it is THAT big so stay tuned!!), I'll make a post about the billiards rack I made for my husband for our 8th wedding anniversary.


We had partly DIY'd a pool table a few month prior (but that's a future post) so I thought this little guy would make a nice gift. I used all scrap pine with a few full sized 1x4's. I did not use any stain or sealer on this because I wanted to leave that choice up to my husband and so far it is still unfinished.


I find myself using random circular objects to aide in circle making. No shame... this one came fresh off my compost pail.


No photo of this but the next step is to use a hole saw to cut the openings for your cue sticks. The bottom of the cue stick shelves are notched out just the same as for the balls (described below).


Originally I wanted to put two drawers in the bottom center but I quickly realized that in order to do so I would have needed two things 1) more time and 2) a budget that exceeded $0 so that I could have used 1x6's for the framework.

Keep in mind, I had no plan and this was a total fly-by-the-seat-of-my-pants project. PLUS was done in about 2 days, during my babies 1 hour nap time. I did the cutting/sanding all on day one then hid it all in places my husband would not find. Then day two was assembly day. It was a great surprise.

Thursday, April 19, 2012

Holy Table!

My mom and I talked off and on for over a year before we finally got around to build her new dining table. Sadly, the family table she had owned for over 30 years just was not able to be repaired again. So we went ahead and designed one that could fit all of her 9 grandkids plus a few adults. This bad boy is a full TEN FEET LONG! It's a few months into its life now and is holding up quite well to the child abuse it see's.  


**I have now finished a full blog post on the building of this table! Check it out!**


Wednesday, April 18, 2012

Trash or Treasure?

As promised, I'm back! Today's post is about taking a nasty thrift store piece of furniture and breathing new life into it. We had purchased a new, very large, television and had to upgrade from our old armoire. We hit the nearest thrift store and what do you know, it was 50% off furniture day! AND they had the perfect (and dirty) dresser that could be easily turned into a TV Stand. So for $30 plus the cost of a little sand paper and white paint, I give you this!
It holds so much! And inside the center doors are three drawers that work perfectly for all of our DVD's and gaming gear. On the left side I store my photos and albums and the right side are for all the kids coloring books and games. It's perfect for our needs. Proving you can take trash to treasure (although I did get lucky with find this as fast as I did)!

Tuesday, April 10, 2012

What a year!

Well it took me a while to admit it, but, I have a bad back. I went MONTHS ignoring it, months stretching it, then had an MRI that revealed my crappy discs and one that had so graciously herniated all over my nerves. Weeks of therapy and injections lead to nothing. So in Mid-February of this year I finally had surgery, a laminectomy and discetomy. I am 7 weeks post op on and technically I still have at least 5 more weeks before the doctor would want me to build, but I just can't wait to get back into projects. I have done quite a bit over the last year that I would love to share here. So look for much more project posts and new stuff SOON!

Tuesday, January 25, 2011

My little bench...

When last I wrote I talked of a barn door project... well that did not turn out quite how I planned. I had hoped for a nice living room/coffee table piece. But in turn I decided that I don't have room in my living room for it. I did finish the project, well the build at least. I will wait for spring to prime and paint and then it will be going on our deck as a toy box/coffee table. So more to come on that... in about 3 month when it's not so stinking Ohio cold (although it is a balmy 28 right now)!

We also have had another round of sick. Seriously, it doesn't end, ever! The time it was my poor DH again. He had the flu. Like the real, doctor diagnosed, sick for over a week, coughing up a lung,  flu. He is finally back to work today. That is why I am here and finally have a moment to post what I completed last week.

My little bench...

Thanks again to my dear Ana White! A few weeks ago she posted a plan for the Farmhouse Bench! I just so happened to have all the wood for the build and quickly (read, over about two weeks time because I have a back issue that was really bad for a few weeks) got to work on the build. I scaled the size down to 4 foot so that it would fit perfectly under my dining room table. But once it was complete I realized that if the bench was all the way pushed in I didn't have room to push my other chairs all the way in. So after some moving around my little bench has found a home at my "island" (maybe I'll make a post about that sometime). It gives the little ones a place to set their bums and watch or help me cook. I hope to be able to sit there and learn to sew (my New Years Resolution). Thank you Ana... you are like my for-fake BFF... in my head... in all of our heads. Photo time :) !!!!

Working on assembly:


I painted the base and stained the top before I connected the two. Final product (note my attempted at distressing the top):


Thanks for looking! I'm not sure when I will be back. I have been taking it easy these days. I am nursing a bad back and planning for spring and our first veggie garden at this house (lots of work needs to be done... maybe a raised bed post in my future!). 
 
Pin It button on image hover